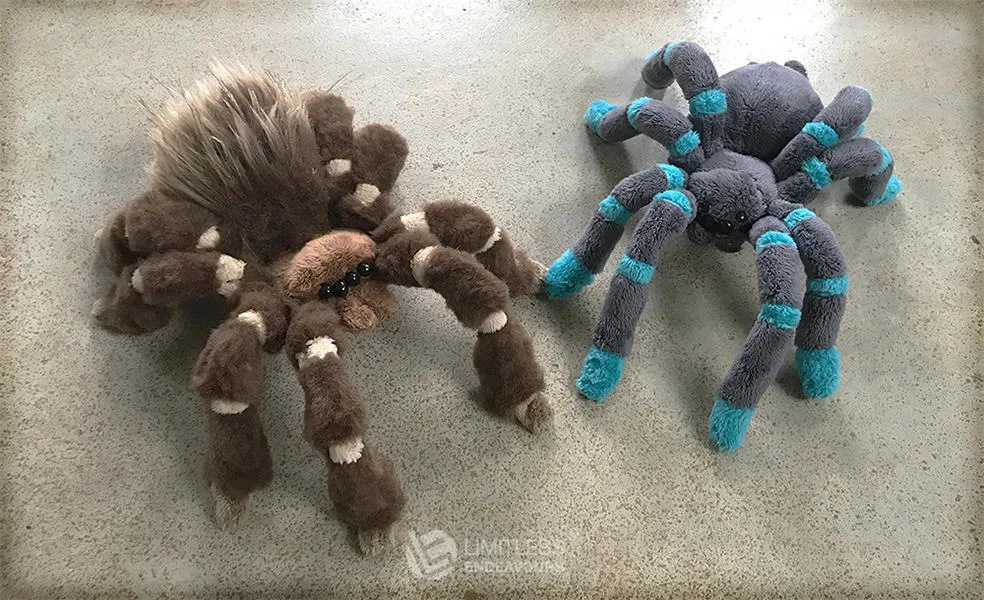
What is a Tarantula Sewing Pattern
A tarantula sewing pattern is a template and set of instructions used to create a plush or fabric tarantula. These patterns come in various levels of difficulty, from beginner-friendly designs to more complex projects for experienced sewers. They typically include diagrams, measurements, and detailed steps to guide you through the process. The appeal of a tarantula sewing pattern lies in the ability to craft a unique, personalized, and often cuddly representation of this fascinating creature. Whether you are looking to make a realistic replica or a more whimsical interpretation, a sewing pattern provides the framework for bringing your tarantula vision to life. Sewing your own tarantula allows for customization in terms of size, fabric, color, and added details, making each creation one-of-a-kind. With the right pattern and some basic sewing skills, anyone can enjoy the rewarding experience of creating their own adorable arachnid.
Materials Needed for Tarantula Sewing
Gathering the right materials is essential for a successful tarantula sewing project. Having everything prepared before you begin will make the process smoother and more enjoyable. The basic materials you will need include fabric, thread, a sewing needle, stuffing, and embellishments. The specific types of fabric, thread, and embellishments will depend on the pattern and the look you are aiming for. Some projects may also require additional tools like a fabric marker, scissors, pins, and a sewing machine. It is helpful to have a workspace set up with good lighting and enough room to spread out your pattern pieces and fabric. Make sure that you have a comfortable chair and that all of your materials are easily accessible. This will help you focus on the sewing and avoid any unnecessary interruptions. The careful selection of materials will ensure that your final tarantula looks great and is durable.
Fabric Choices

The choice of fabric can significantly impact the appearance and feel of your tarantula. For a realistic look, consider using materials like faux fur, fleece, or felt. These fabrics can mimic the texture and appearance of a real tarantula’s hairy body. Faux fur can be particularly effective for creating a plush and cuddly spider, while fleece offers a soft and easy-to-sew alternative. Felt is a good choice for beginners due to its stability and ease of use. Cotton and linen fabrics can also be used, especially for creating a stylized or cartoonish tarantula. Consider the color and pattern of the fabric, opting for browns, blacks, or grays to achieve an authentic appearance. The weight and texture of the fabric will also affect how the tarantula drapes and how easy it is to handle. Ensure that the fabric is durable and can withstand the stuffing process and any potential wear and tear.
Thread and Needle Selection
Selecting the appropriate thread and needle is vital for a sturdy and well-sewn tarantula. Choose a thread color that closely matches your fabric to ensure that the seams blend seamlessly into the design. Polyester thread is a good all-purpose choice as it is strong and durable. Cotton thread can also be used, but it may not be as strong or resistant to wear. The needle size should correspond to the weight of your fabric. For thicker fabrics like faux fur or fleece, use a larger needle. For thinner fabrics like felt or cotton, a smaller needle is sufficient. When sewing by hand, a sharp, fine needle will make it easier to penetrate the fabric and create neat stitches. If you are using a sewing machine, make sure to select the correct needle type and size for your machine and fabric. Always test your thread and needle on a scrap piece of fabric before starting your main project to ensure that the stitching is smooth and consistent.
Stuffing and Embellishments
The stuffing and embellishments are what give your tarantula its shape, personality, and unique characteristics. Choose a stuffing material that provides the desired firmness and feel. Polyester fiberfill is a popular choice because it is readily available, lightweight, and easy to work with. It is also hypoallergenic and washable. For a firmer feel, you can use a combination of fiberfill and poly pellets. These small plastic beads can be added to the body and legs to give the tarantula weight and stability. Consider using different stuffing densities in various parts of the tarantula to create a more realistic or expressive shape. For embellishments, you can use a variety of materials to add details. This might include felt or fabric for the eyes, fangs, and other features. Buttons, beads, or embroidery floss can also be used to create additional texture and visual interest. Remember to attach all embellishments securely to prevent them from detaching during handling or play.
Step-by-Step Guide to Sewing Your Tarantula

Embarking on your tarantula sewing project can be an exciting adventure. Following a step-by-step guide will help you navigate the process with ease. The following sections will provide a detailed overview of the steps, starting with pattern preparation and culminating in the finishing touches. Always take your time, read the instructions carefully, and double-check your work to ensure that everything aligns correctly. Patience is key, and the rewarding feeling of creating your own tarantula will be well worth the effort. Feel free to customize the design and add your own unique flair. Remember that practice makes perfect, and each project will help you hone your skills and become more confident in your sewing abilities. Enjoy the journey of bringing your tarantula to life, stitch by stitch.
Pattern Preparation
Pattern preparation is the first crucial step in sewing your tarantula. Before you start, gather your pattern pieces and carefully examine them. Some patterns are printed, while others require you to trace the pieces from a template. If the pattern has multiple sizes, make sure you select the correct size for your project. Lay out your fabric and arrange the pattern pieces according to the pattern instructions, paying close attention to the grainline, which indicates the direction in which the fabric should be cut. Use pins or pattern weights to secure the pattern pieces to the fabric. Double-check that all the pieces are correctly positioned and that you have enough fabric to accommodate them. Before cutting, it’s always a good idea to measure and make sure you have enough fabric, adding a little extra if necessary. With everything correctly prepared, you are ready to move on to the next step: cutting.
Cutting the Fabric
Carefully cutting the fabric according to the pattern pieces is essential for ensuring that your tarantula comes together correctly. Use sharp scissors or a rotary cutter with a cutting mat for precise results. When using scissors, follow the pattern lines precisely. For intricate shapes or curves, it may be helpful to use small, accurate cuts. When using a rotary cutter, ensure that the blade is sharp and that you are cutting on a safe surface. Cut around the pattern pieces, leaving a seam allowance as indicated on the pattern (usually about 1/4 to 1/2 inch). This allowance is the extra fabric needed for sewing the seams. Make sure to cut all the necessary pieces, including the body, legs, and any other details specified in the pattern. Take your time and be precise, as any errors in cutting can affect the final shape and proportions of your tarantula. After cutting, remove the pattern pieces and set them aside for future use.
Sewing the Body

Once the fabric pieces are cut, it is time to start sewing the body of your tarantula. Align the fabric pieces as instructed in the pattern, usually with right sides together (the sides you want to be visible on the finished product). Use pins to hold the pieces in place, ensuring that the edges are aligned. If you are using a sewing machine, use a straight stitch and sew along the seam allowance, following the pattern guidelines. If you are hand-sewing, use a backstitch or a similar strong stitch to secure the seams. As you sew, go slowly and carefully, making sure that the fabric pieces stay aligned. After sewing the seams, remove the pins and trim any excess fabric close to the stitches, if necessary. Turn the body right side out, and you will start to see the shape of your tarantula emerge. Ensure all seams are secure and reinforced for durability. This step is fundamental to the overall structure of your tarantula, so take your time and double-check your work to ensure perfect alignment.
Adding the Legs and Details
Adding the legs and other details to your tarantula brings it to life and gives it its unique personality. Depending on the pattern, the legs may be sewn separately and then attached to the body, or they may be sewn directly onto the body. Follow the pattern instructions for attaching the legs, ensuring that they are securely attached to the body. You can use pins to position the legs correctly before sewing. For the details, you might add eyes, fangs, or other features. These can be made from felt, fabric, or other materials. Use a needle and thread or fabric glue to attach the details to the body. Consider using different colors and textures to create contrast and visual interest. Take care to ensure that all details are securely attached so they do not come loose during handling. Adding these details is where your creativity can really shine, allowing you to personalize your tarantula. Be creative and make it unique.
Stuffing and Finishing Touches
Stuffing your tarantula and adding the finishing touches completes your project. Before stuffing, turn the tarantula body right side out if you haven’t already. Then, use fiberfill or other stuffing material to fill the body and legs. Start by stuffing the legs first, and then move on to the body. Use a stuffing tool or your fingers to push the stuffing into every nook and cranny, making sure to distribute it evenly. Once the body is filled to your desired firmness, close the opening with a hand-sewn seam. Use an invisible stitch or a ladder stitch for a neat and professional finish. After closing the opening, add any final details, such as attaching the eyes, fangs, or other embellishments. Give your tarantula a final check to ensure that everything is secure and that you are happy with the result. Trim any loose threads, and your tarantula is now ready for display or play.
Tips for a Perfect Tarantula Sewing Project

To ensure that your tarantula sewing project is successful, here are some useful tips to keep in mind. Begin with a simple pattern, especially if you are a beginner. This will help you become familiar with the process without feeling overwhelmed. Take your time and do not rush the process. Sewing a tarantula is a project that requires patience. Read all the instructions carefully before you start, and refer back to them frequently as you sew. Ensure that you have all of the necessary materials before you begin, including the right fabric, thread, needle, and stuffing. Consider using a fabric marker to transfer pattern markings onto the fabric. This will make it easier to align the pieces and sew them together correctly. If you are using a sewing machine, practice your stitches on a scrap piece of fabric before you start working on the project. Make adjustments to your tension as needed. And finally, don’t be afraid to make mistakes, as these are a valuable part of the learning process.
Choosing the Right Pattern
Choosing the right pattern is essential for a successful tarantula sewing project. Consider your skill level when selecting a pattern. If you are a beginner, start with a simple pattern that has few pieces and clear instructions. Look for patterns that include detailed diagrams and photos to guide you through the process. Read reviews of the pattern online to see what other sewers have experienced. Check the pattern’s size range. Ensure that the finished size of the tarantula is appropriate for your intended use. Decide on the style of tarantula you want to create, whether it is realistic, cartoonish, or stylized. Choose a pattern that matches your vision. Consider the materials required by the pattern, and make sure you are comfortable with the fabric and embellishments specified. Check the complexity of the pattern; some patterns are more involved and require more experience. Select a pattern that you find visually appealing and that you are excited to sew. Finally, remember that you can always modify a pattern to suit your preferences.
Mastering Basic Stitches
Mastering basic sewing stitches will improve your sewing skills and help you achieve professional-looking results. The most fundamental stitch is the straight stitch, which is used for most seams. To perform a straight stitch, insert the needle and thread through the fabric, then pull the thread through. Then, insert the needle a short distance away and pull the thread through. Repeat this process, maintaining a consistent stitch length. The backstitch is another important stitch, used to reinforce seams and create durable connections. To make a backstitch, bring the needle up through the fabric, then insert it a short distance ahead and bring it back up at the point where the thread emerged. The running stitch is another useful stitch. It is a simple stitch used for gathering fabric and is less secure than other stitches. The slip stitch is an invisible stitch used to close openings and create a clean finish. Practice these stitches on scrap fabric before you start your project. Understanding these basic stitches will allow you to sew a variety of tarantula parts and create a professional-looking product.
Troubleshooting Common Issues

During your tarantula sewing project, you may encounter some common issues. If the fabric bunches or puckers, it may be due to incorrect tension on the sewing machine or hand-sewing stitches that are too tight. Adjust your machine’s tension or loosen your stitches to resolve this issue. If the seams are uneven or the fabric is shifting, ensure that you are aligning the fabric pieces correctly and using pins to secure them. If the stuffing is lumpy or uneven, redistribute the stuffing to create a smoother shape. If you are having trouble sewing around curves, try snipping the seam allowance in several places to make the fabric more flexible. If your stitches are breaking, check your thread and needle to make sure they are appropriate for the fabric. If the needle is bending, replace it with a new one. If you are unsure about how to fix a problem, consult your pattern instructions or search online for advice. With a little patience and troubleshooting, you can overcome any sewing challenges and successfully complete your tarantula project.
Displaying and Caring for Your Tarantula
Once your tarantula is complete, you will want to display and care for it properly. Choose a safe and prominent location to display your creation, such as a shelf, desk, or bed. Keep it away from direct sunlight, which can fade the colors of the fabric. If your tarantula gets dusty, you can gently clean it with a soft brush or a slightly damp cloth. Avoid using harsh chemicals or detergents. If your tarantula is a toy, make sure that the embellishments are securely attached to prevent choking hazards. For safety, supervise children while they are playing with the tarantula. If the fabric becomes damaged, consider repairing it with a needle and thread or by replacing the damaged section. Store your tarantula in a clean, dry place when it is not in use. With proper display and care, your handmade tarantula will remain a cherished item for years to come, a testament to your creativity and sewing skills.