Understanding Marlin Firmware
Marlin Firmware is a popular open-source firmware specifically designed for controlling 3D printers. It acts as the brain of your printer, interpreting G-code instructions and controlling the movement of the motors, the heating of the bed and nozzle, and all other aspects of the printing process. Marlin is known for its versatility, extensive feature set, and active community support, making it a great choice for the TEVO Tarantula and many other 3D printers. This firmware allows you to customize and fine-tune your printer’s performance to achieve better print quality and overall reliability. It’s a crucial element in your 3D printing setup, enabling you to take full control of your machine.
Why Marlin Firmware for TEVO Tarantula
The TEVO Tarantula, being a widely-used and versatile 3D printer, greatly benefits from Marlin Firmware. The stock firmware often lacks advanced features and customization options that Marlin provides. By installing Marlin, you gain access to features like advanced bed leveling, thermal runaway protection, and improved print quality through precise control of the printer’s movements and temperature. The TEVO Tarantula can be enhanced to operate more efficiently and produce higher-quality prints. The Marlin firmware allows you to push the limits of your printer and experiment with different settings to optimize printing outcomes. This ultimately results in prints with superior detail, fewer errors, and a more enjoyable 3D printing experience.
Benefits of Upgrading to Marlin
Upgrading to Marlin offers a plethora of advantages. Firstly, it provides significantly improved print quality, enabling finer details and smoother surfaces. Secondly, Marlin offers enhanced safety features, like thermal runaway protection, which prevents the printer from overheating and potentially causing a fire. Thirdly, it allows for extensive customization, giving you control over various aspects of the printer’s behavior, from movement speed to temperature control. Moreover, the large and active Marlin community provides abundant resources, tutorials, and support, making troubleshooting and optimization much easier. Finally, Marlin often improves the reliability of your prints, reducing the chances of failed prints and wasted materials. This ensures that your printer is performing at its best, leading to greater success in your 3D printing projects.
Downloading and Preparing Marlin Firmware
Before you begin, you’ll need to download Marlin. Go to the official Marlin Firmware GitHub repository. From there, download the latest stable release. Once downloaded, you’ll need to install the Arduino IDE (Integrated Development Environment) on your computer, which is required to modify and upload the firmware to your printer. Make sure you have the necessary drivers installed for your TEVO Tarantula, and that the board is correctly identified. This preparation ensures that the flashing process will be smooth, and that you can properly configure the firmware for your specific printer model.
Finding the Right Firmware Version
When downloading Marlin, it’s important to find the correct version compatible with your TEVO Tarantula’s board (typically a Melzi board). Check your printer’s documentation or the online community to identify your board type. Newer versions of Marlin often include pre-configured settings for common 3D printer models, which can save you time and effort. Researching which version is most stable and best suited for your specific setup will contribute to a more successful installation. Look for versions recommended by other TEVO Tarantula users, as this often indicates better compatibility and fewer issues during setup and operation.
Setting up the Arduino IDE
Setting up the Arduino IDE involves installing it on your computer and configuring it to work with your TEVO Tarantula’s board. After installing the IDE, you’ll need to install the necessary board definitions. Open the Arduino IDE, go to “File” > “Preferences,” and paste the board manager URL for your specific board into the “Additional Board Manager URLs” field. Then, go to “Tools” > “Board” > “Boards Manager” and search for the board definition. Once installed, select the correct board and processor from the “Tools” > “Board” menu. Ensure you choose the correct port where your TEVO Tarantula is connected. Proper configuration of the Arduino IDE is crucial for successfully uploading the Marlin firmware to your printer.
Configuring Marlin for Your TEVO Tarantula
Configuring Marlin is the most crucial step. You’ll need to adjust various settings within the Configuration.h and Configuration_adv.h files to match your TEVO Tarantula’s specifications. This includes setting the correct board type, defining your printer’s bed size, and calibrating the steps per millimeter for your extruder and axes. These settings define how your printer will operate, and incorrect settings can lead to print errors or hardware damage. Always double-check these settings before uploading the firmware. Take the time to understand each setting and how it impacts your printer’s performance. This is where you will customize the firmware to work perfectly with your TEVO Tarantula.
Understanding Configuration.h
The Configuration.h file is the heart of your Marlin setup, containing the most important settings for your printer. This file allows you to configure the board type, the thermistors used for temperature sensing, the bed size, and other hardware-specific parameters. Within Configuration.h, you’ll also find settings for features like bed leveling, endstop configuration, and safety features. Carefully review each setting, and make the necessary adjustments to match your TEVO Tarantula’s components. It’s important to understand each setting and how it affects the printer’s behavior. Refer to the Marlin documentation and online resources for detailed explanations of each setting to ensure your printer is configured properly.
Adjusting Bed Size and Other Settings
Setting the correct bed size is crucial for ensuring your prints stay within the printable area. You’ll need to measure the dimensions of your printer’s build plate and enter these values in the Configuration.h file. Other important settings include the steps per millimeter for your X, Y, and Z axes, which define how far the axes move with each step of the motor. You might also need to adjust settings for your extruder, such as the steps per millimeter and the direction of rotation. Make sure to save your changes after making these adjustments. These configurations will impact your print accuracy and overall print quality, so accurate settings are critical.
Calibrating Your Extruder
Accurate extruder calibration is essential for achieving consistent and high-quality prints. To calibrate your extruder, you need to determine the correct steps per millimeter (E-steps). First, mark a point on your filament a certain distance from the extruder. Next, command your printer to extrude a specific amount of filament (e.g., 100mm). Then, measure the actual distance the filament has traveled. Adjust the E-steps value in Configuration.h and repeat the process until the extruded distance matches the commanded distance. Properly calibrated E-steps ensure that the printer extrudes the correct amount of filament, leading to better print quality and reducing issues such as under-extrusion or over-extrusion.
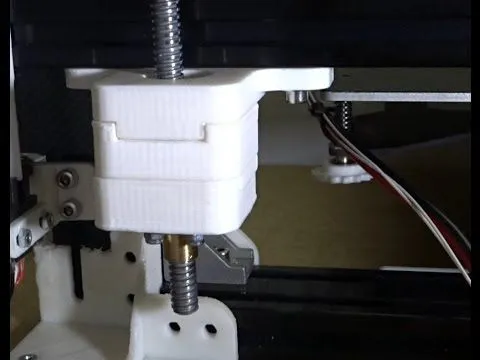
Flashing Marlin Firmware to Your TEVO Tarantula
After configuring Marlin, you’re ready to flash it to your TEVO Tarantula. Connect your printer to your computer via USB and make sure the Arduino IDE recognizes the correct COM port. In the Arduino IDE, go to “Sketch” > “Upload.” The IDE will compile the firmware and upload it to your printer’s board. During this process, monitor the output in the IDE’s console for any errors. If the upload is successful, the firmware will be installed on your printer. This is a critical step, so ensuring a good USB connection and a stable power supply to your printer is essential. Double-check all settings and connections before starting the upload.
Connecting to Your Printer
Before uploading the firmware, ensure your TEVO Tarantula is properly connected to your computer. Use a reliable USB cable to connect the printer to your computer. In the Arduino IDE, you must select the correct COM port corresponding to your printer. Verify that the printer is powered on during the upload process. Make sure you close any other applications that might be using the same COM port to avoid conflicts. Confirming a good and stable connection is vital for a successful firmware upload. Problems with the connection can lead to upload failures or corrupted firmware, potentially rendering your printer unusable.
Uploading the Firmware
In the Arduino IDE, click the “Upload” button to start the process of uploading the firmware to your printer. The IDE will compile the Marlin code and then transfer it to your printer’s control board. You should see progress messages in the console window at the bottom of the IDE. Monitor these messages for any errors that may occur during the upload. If the upload is successful, the Arduino IDE will display a “Done uploading” message. If you encounter any errors, carefully review the error messages and troubleshoot accordingly, often by verifying your settings in Configuration.h. Once the upload completes successfully, you’re ready to test your new Marlin firmware.
Testing and Troubleshooting

After uploading the firmware, it’s time to test your printer and ensure everything is working correctly. Perform a series of tests, including moving the axes, heating the bed and nozzle, and extruding filament. You can do this through the printer’s control panel or by sending G-code commands via a program like Pronterface. Thoroughly test all the features to confirm they are operating correctly. Any issues should be addressed immediately to prevent printing problems. If any problems arise, consult the troubleshooting tips.
Initial Print Testing
Begin by printing a simple test object, such as a calibration cube. Monitor the print closely to check for any issues, such as bed adhesion problems, layer shifting, or incorrect dimensions. Ensure the bed is leveled correctly and that the first layer adheres properly. Observe the printer’s movements to see if the axes are moving smoothly and accurately. Review the print settings, such as the temperature, speed, and layer height, for optimal performance. These initial print tests are crucial for detecting any configuration errors or hardware problems. This allows you to fine-tune the settings and improve your prints.
Common Issues and Solutions
If you encounter issues, here are some common problems and their solutions. If the printer doesn’t move or heats up incorrectly, double-check the wiring, the motor drivers, and the temperature sensor settings. If the print quality is poor, verify the extruder calibration, bed leveling, and print settings like temperature and speed. If the printer crashes or freezes, make sure that your board settings are correct and the firmware isn’t corrupted. Use the community resources for troubleshooting, and seek help from other Marlin users, which often have solutions for issues. The Marlin community and documentation are valuable resources for diagnosing and fixing problems.
Final Thoughts

Upgrading to Marlin firmware on your TEVO Tarantula can significantly enhance its performance and capabilities. While the initial setup might seem daunting, the benefits of improved print quality, added features, and enhanced safety make it well worth the effort. By following these tips, you can successfully install and configure Marlin firmware, unlocking the full potential of your 3D printer and improving print quality. Remember to consult the official Marlin documentation, the TEVO Tarantula community forums, and other resources to troubleshoot issues and optimize your settings. Enjoy the enhanced 3D printing experience that Marlin offers!