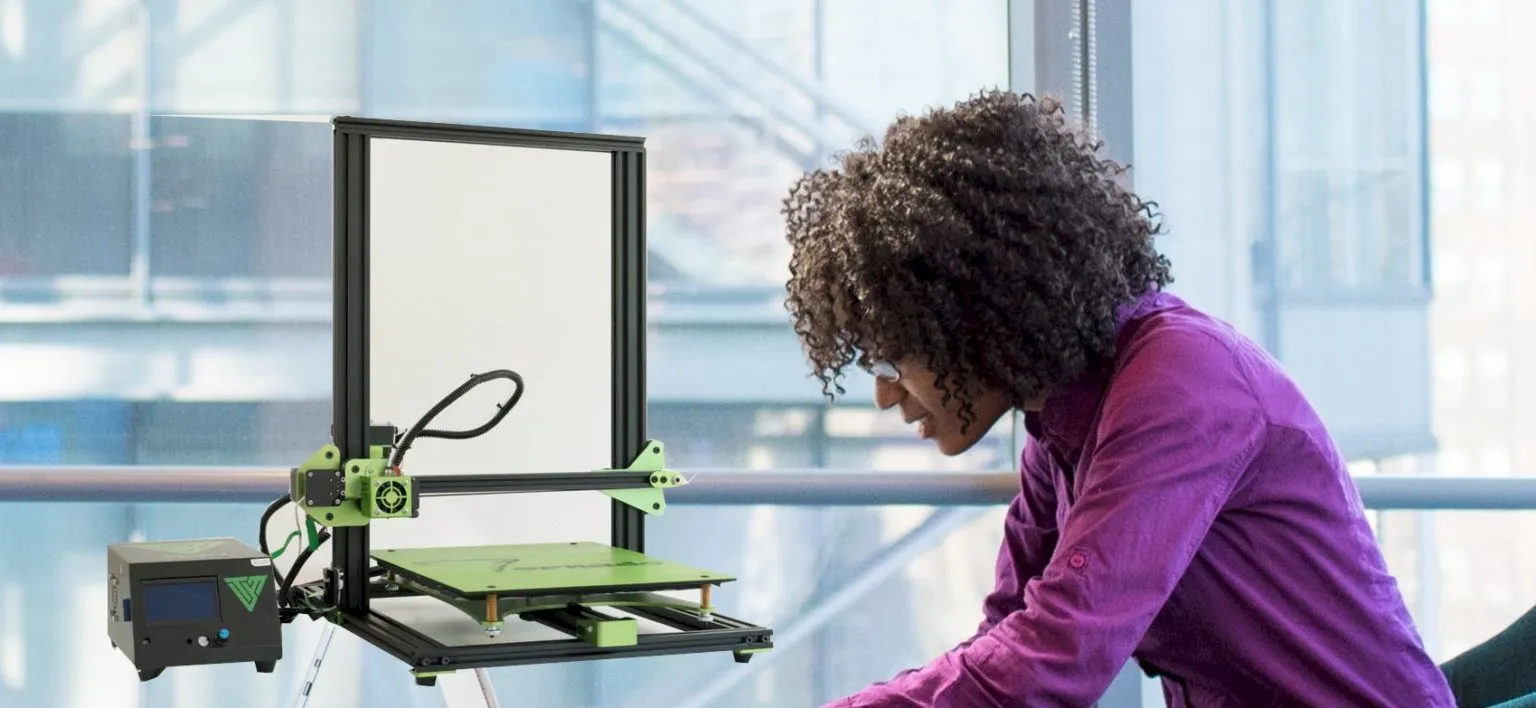
What is the Gearbest Tevo Tarantula
The Gearbest Tevo Tarantula is a popular and affordable DIY 3D printer kit, known for its ease of assembly and potential for upgrades. It’s a great entry point into the world of 3D printing, offering a hands-on experience that allows you to learn about the technology while creating functional and aesthetic objects. This guide is designed to take you through the entire build process, from unboxing to your first successful print, ensuring a smooth and enjoyable experience. The Tevo Tarantula’s open-source nature also encourages experimentation and customization, allowing users to tailor the printer to their specific needs and preferences. Whether you’re a beginner or have some experience with 3D printing, this guide will help you unlock the full potential of your Tevo Tarantula.
Key Features of the Tevo Tarantula
The Tevo Tarantula boasts a number of features that make it an attractive choice for beginners and hobbyists alike. It typically features a build volume that allows for printing of moderate-sized objects. The frame construction is usually made of aluminum extrusions, providing a sturdy and relatively stable base for printing. It often comes with a heated bed, which is essential for printing with materials like ABS and PETG, as it helps to prevent warping. Many versions of the Tevo Tarantula include a basic LCD screen and control panel for easy operation. The printer’s open-source nature also means a wealth of community support and readily available upgrades, expanding its capabilities far beyond the initial configuration. Overall, its combination of affordability, build volume, and upgradability make it a well-rounded 3D printer.
Assembly of the Gearbest Tevo Tarantula

Building your Gearbest Tevo Tarantula can be a rewarding experience. It involves several steps, each contributing to the final functionality of the printer. Take your time during the assembly process and carefully follow the instructions. Ensure all screws are tightened properly, but be careful not to overtighten, as this can damage the components. The process is generally straightforward, but it’s important to pay attention to detail. Before you begin, organize all of the included parts and tools to make the assembly process smoother and more efficient. This section will guide you through each step, providing helpful tips and tricks along the way to ensure your build is successful.
Unboxing and Preparation
Before you dive into the build, start by carefully unboxing all the components of your Tevo Tarantula. Lay out all the parts and take inventory to ensure everything is present according to the parts list. This is a critical step, as missing components can halt your progress. Organize the parts, separating them into logical groups (frame components, electronics, screws, etc.). It’s helpful to have a clear workspace with good lighting and plenty of room to move around. Also, gather the necessary tools, such as Allen wrenches (often provided), a screwdriver, and possibly a pair of pliers. Consider watching some online build videos to familiarize yourself with the process, which will enhance your understanding and make the assembly more efficient. Now you’re ready for the build.
Step 1 Assembling the Frame
The frame provides the structural foundation of the 3D printer. Start by connecting the vertical extrusions to the base extrusions, using the appropriate corner brackets and screws. Make sure the frame is square and that all connections are tight. Accuracy at this stage will directly impact the print quality. Take your time and double-check all measurements and alignment. You might find it helpful to use a level or a square to ensure the frame is perfectly aligned. Once the frame is assembled, you’ll need to attach other frame components, such as the Z-axis supports, to hold the print bed. Properly assembled frame ensures the printer operates smoothly and precisely. The frame is the backbone of your printer, so make sure it’s built correctly.
Step 2 Installing the Electronics

Installing the electronics involves placing the control board, power supply, and other electronic components onto the frame. Carefully mount the control board in its designated location, usually using the provided screws or standoffs. Connect the power supply to the frame, ensuring proper ventilation and following the safety guidelines. Connect the stepper motor drivers and ensure they are correctly oriented. This step requires a basic understanding of electronics and wiring. Consult the manual carefully, paying attention to the polarity and proper connections. Use zip ties or cable management clips to keep the wiring neat and organized, as this helps to avoid tangles and potential interference with moving parts.
Step 3 Wiring the Components
Wiring is a crucial step where you connect all the electronic components. Begin by connecting the stepper motors to their respective drivers on the control board (X, Y, Z, and E for the extruder). Then, connect the endstops, heated bed, hot end, and LCD screen to the control board. Use the wiring diagram provided in the manual to ensure each wire is connected correctly. Double-check all connections, ensuring that wires are securely fastened and properly insulated. Pay attention to wire gauge and make sure it’s suitable for the current being drawn by the components. After completing the wiring, take the time to tidy up the wires. Properly routed and secured wiring minimizes the risk of shorts and enhances the overall reliability and performance of your printer. Once all the wiring is complete, carefully inspect all connections before powering on your printer.
Step 4 Attaching the Print Bed and Extruder
Mounting the print bed and extruder is the next step. The print bed is usually attached to the Z-axis supports and slides, allowing it to move up and down. Ensure the bed moves smoothly without binding. Then, mount the extruder to the X-axis carriage. The extruder is responsible for melting and pushing the filament through the nozzle. Make sure the hot end is securely attached to the extruder assembly. Carefully connect the wiring for the hot end and the heated bed. Double-check the mechanical movements to make sure there is no interference between the hot end, print bed, and frame. Check the belts for proper tension. Properly installed print bed and extruder are essential for achieving high-quality prints. Once completed, the physical build of the 3D printer should be finished, and you are ready to move onto the calibration phase.
Calibrating Your Tevo Tarantula for Perfect Prints

Calibration is vital to get high-quality prints from your Tevo Tarantula. It involves adjusting the printer’s settings and parameters to ensure it operates correctly. This includes bed leveling, extruder calibration, and adjusting firmware settings. Calibration ensures that the first layer adheres properly to the print bed, the filament is extruded at the correct rate, and the printer moves smoothly and accurately. Proper calibration is important for print quality and overall usability. There are several aspects to calibrate to ensure the best printing quality and precision from the beginning. Take your time with calibration to avoid issues.
Bed Leveling
Bed leveling is a fundamental step in 3D printing calibration. It ensures the distance between the nozzle and the print bed is consistent across the entire printing surface. This affects the quality of the first layer. There are several methods for bed leveling, including manual leveling using paper, and using auto-bed leveling sensors. Manual leveling usually involves adjusting the bed’s corner screws until the nozzle is the correct distance from the bed. Auto-bed leveling sensors automatically measure the bed’s surface and adjust the Z-axis accordingly. Whichever method you use, the goal is to achieve a level bed. Proper bed leveling is essential for print adhesion and preventing warping or other print defects.
Extruder Calibration
Extruder calibration ensures that the printer extrudes the correct amount of filament. This involves measuring how much filament the extruder motor pushes through the nozzle. The most common calibration method is to mark the filament at a certain point, then command the extruder to extrude a specific length. Measure the actual distance extruded and adjust the E-steps value in the printer’s firmware. This ensures the correct flow rate for the material. A properly calibrated extruder will produce prints with the correct dimensions and details. Incorrect calibration can lead to under-extrusion or over-extrusion, impacting print quality. This is a critical step for all users and should be performed every time you change materials or nozzle sizes.
First Print and Troubleshooting

Once you have completed the build and calibration, you can try your first print. Choose a simple test model. Start with a print with low-temperature settings for the hot end and print bed, depending on the material used. Observe the first layer of the print to ensure it adheres properly to the bed. If the first layer doesn’t stick or has imperfections, re-check your bed leveling and calibration settings. During the printing process, pay attention to any unusual noises or movements. Take notes about any issues you encounter, as this will help you troubleshoot any problems. Make small adjustments to the settings, such as temperature or speed, to optimize the print quality. Your first print is a learning experience, and it will help you understand your printer’s behavior.
Common Issues and Solutions
Even with careful assembly and calibration, you may encounter common issues. Here’s a look at some of the most common issues and solutions. One common problem is poor bed adhesion, which can be addressed by leveling the bed, cleaning the bed surface, or using adhesive like glue stick or painter’s tape. Warping is another issue that can be solved by increasing the bed temperature or using an enclosure. Over-extrusion can cause blobs and oozing, and is fixed by calibrating the extruder. Under-extrusion can cause weak layers or gaps, which is solved by recalibrating the extruder, or adjusting the nozzle temperature. Troubleshooting 3D printing often involves methodical checking. By understanding common problems and their solutions, you can improve your printing success.
Improving Print Quality
Improving print quality involves more than just proper assembly and calibration. There are several ways to optimize your prints. First, experiment with different print settings. Adjust the printing speed, layer height, and infill to find the best results. Use the right materials and settings for the specific model you’re printing. Higher print temperatures may be necessary for some materials. You should also ensure good environmental conditions like minimizing drafts and maintaining a stable temperature. Regularly clean your printer, lubricate moving parts, and check for loose screws. Remember that printing is a learning process. The best thing is to experiment, document the results, and continuously refine your approach.
Software and Firmware for Tevo Tarantula

Setting up software and firmware is another key step in the process. You’ll need slicing software to convert 3D models into instructions that the printer can understand, commonly referred to as G-code. Popular options include Cura, PrusaSlicer, and Simplify3D. You should also get familiar with the firmware on your printer. The firmware controls the printer’s functions and behavior. The Tevo Tarantula often uses Marlin firmware, which can be customized and updated. You can usually find firmware updates from the manufacturer or the community. Proper software and firmware settings will allow you to take full advantage of your 3D printer’s capabilities and achieve high-quality prints.
Slicing Software Setup
Slicing software is an essential tool for preparing your 3D models for printing. The software takes the 3D model and slices it into thin layers. It then generates the G-code, which is a set of instructions the printer follows to build the object. The slicing process involves setting various parameters, such as layer height, infill density, printing speed, and temperature. Experimenting with these settings is important to optimize your prints. Each material requires specific settings. It also allows you to generate supports if needed. Take the time to learn the settings and understand how they affect the final print. This will significantly improve the quality of your prints.
Firmware Updates
Firmware updates can enhance the performance and functionality of your Tevo Tarantula. Updating the firmware can fix bugs, add new features, and optimize the printer’s behavior. Before updating the firmware, make sure to back up your current settings. Then, download the latest firmware version and follow the instructions provided by the manufacturer or the community. Updating the firmware often involves connecting the printer to your computer and uploading the new firmware using a program like Arduino IDE. Make sure the firmware is compatible with your printer model. Carefully follow the instructions to avoid bricking your printer. Firmware updates are a great way to keep your 3D printer current and improve its performance.
Maintenance and Upgrades

Regular maintenance and upgrades are important to ensure your Tevo Tarantula continues to operate at its best. Maintenance includes cleaning the printer, lubricating moving parts, and checking for loose screws or other issues. A clean printer is a happy printer. Regularly inspect the nozzle for clogs. You should also check the belts for proper tension, and tighten them as needed. The Tevo Tarantula is highly customizable, and there are many upgrades available. These include a glass bed, automatic bed leveling sensors, all-metal hot ends, and upgraded control boards. Upgrades can enhance the printer’s performance, accuracy, and reliability. Consider upgrading the printer to improve its performance and expand its capabilities.
Regular Maintenance Tips
Regular maintenance will extend the life of your 3D printer. Here are some of the main tips. First, keep the print bed clean by wiping it down with isopropyl alcohol before each print. Lubricate the Z-axis rods and other moving parts with a suitable lubricant, such as lithium grease or Teflon-based lubricant. Check the belts periodically and tighten them if needed. Inspect the nozzle for clogs. Regularly check and tighten screws. Store the filament properly to prevent moisture absorption. By following these maintenance tips, you can keep your 3D printer in top condition and minimize downtime due to unexpected issues.
Upgrades and Modifications
Upgrading your Tevo Tarantula can significantly enhance its performance and expand its capabilities. There are various upgrades you can consider. For example, you might consider a glass bed for improved print adhesion and surface finish. Auto-bed leveling sensors can greatly simplify the calibration process. An all-metal hot end can handle higher temperatures and more exotic filaments. An upgraded control board will often allow for more advanced features and improved performance. Upgrades often come from the community. Explore online forums and communities. Consider the type of prints you wish to make. Choosing the right upgrades can make a big difference in your printing experience and unlock the full potential of your printer. These upgrades can improve the overall quality.
Building and operating a Gearbest Tevo Tarantula can be a very rewarding project. Enjoy the process!